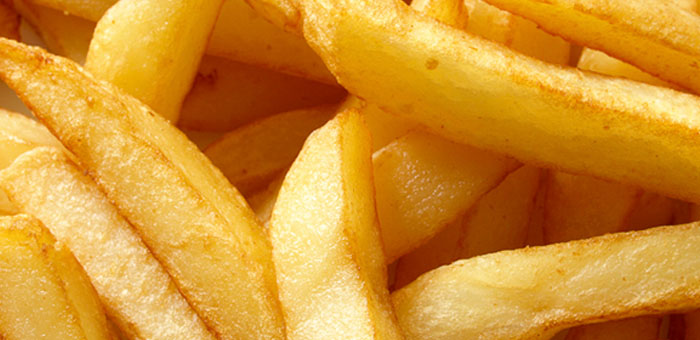
Food trucks around the country have many varied menus based on the cuisine they serve, but one common menu item no matter the cuisine are French fries. Because of this we have decided to create an article to assist those of you wanting to create a fried potato that your customers keep come back for. There are a few factors that go into making the perfect french fry.
Cooking The Perfect French Fry
The exterior must be crisp, but not tough.
In order to achieve crispness, the surface structure of a fry must be riddled with micro-bubbles. It’s these bubbles increase the surface area of the fry, making it extra crunchy. Ideally, this layer should only be as thick as it needs to be to add crispness.
The interior must be fluffy, and have a strong potato flavor.
Fries with a pasty, mealy, or gummy interior are an automatic fail.
The fry must be an even, light golden blond.
Fries that are too dark or are spotty have an off putting burnt flavor that distracts from the potato.
The fry must stay crisp for as long as it takes to eat a full serving.
Fries that come straight out of the fryer are almost always perfectly crisp. The true test of the perfect French fry is whether or not it remains crisp and edible a few minutes later.
So how does one going about achieving these goals? To answer that question, it is important to understand exactly what happens when the perfect French fry is prepared.
Like all plants, potatoes are composed of cells. These cells are held together by pectin, a form of sugar that acts as a type of glue. These cells also contain starch granules, as well as simple sugars. When these starch granules are exposed to water and heat, they begin to swell, eventually bursting, and releasing a shower of swollen starch molecules. Now the problem is, in order to get the ideal crust, all three of these elements must be in the proper balance, and the proper state. With too many simple sugars, your potato will brown long before it crisps. If pectin has broken down too much before the starch granules have had a chance to burst and release their sticky innards, your potatoes will either fail to form a crust, will fall apart before it gets a chance to, or in the worst case will cook up completely hollow.
Blanching the potatoes will rinse off excess simple sugars, helping the fries attain a light gold color, instead of a deep dark brown. It will also activate an enzyme called pectin methylesterase (PME). PMEs strengthen the pectin’s hold on the potato cell’s walls, which helps the potatoes stay firmer and more intact when cooked to a higher temperature. These reinforced walls form the super-tiny bubbles that give them their extra crunch.
Fries boiled in plain water will disintegrate, making them nearly impossible to pick up. On the other hand, those boiled in the vinegar and water will remain perfectly intact, even after boiling for a full ten minutes. When fried, they will have fabulously crisp crusts with tiny, bubbly, blistered surfaces that stayed crisp even when they were completely cool.
In order to stay fluffy and not gummy, a lot of the interior moisture needs to be expelled in the cooking process. The more cooked the potatoes are, the more the cell structure breaks down, and the easier it is for water to be expelled. Boiling your potatoes, in a pot of vinegar and water will give your fries their best internal structure.
Now that you know why we suggest the following process, we will provide a small 4 person serving recipe for you to try and experiment with on your own.
Ingredients:
- 2 pounds russet potatoes (about 4 large), peeled and cut into 1/4-inch by 1/4-inch fries (keep potatoes stored in a bowl of water)
- 2 tablespoons distilled white vinegar
- Kosher salt
- 2 quarts peanut oil
Procedure:
- Place potatoes and vinegar in saucepan and add 2 quarts of water and 2 tablespoons of salt. Bring to a boil over high heat. Boil for 10 minutes. Potatoes should be fully tender, but not falling apart. Drain and spread on paper towel-lined rimmed baking sheet. Allow to dry for five minutes.
- Meanwhile, heat oil in 5-quart Dutch oven or large wok over high heat to 400°F. Add 1/3 of fries to oil (oil temperature should drop to around 360°F). Cook for 50 seconds, agitating occasionally with wire mesh spider, then remove to second paper-towel lined rimmed baking sheet. Repeat with remaining potatoes (working in two more batches), allowing oil to return to 400°F after each addition. Allow potatoes to cool to room temperature, about 30 minutes. Continue with step 3, or for best results, freeze potatoes at least over night, or up to 2 months.
Freezing the potatoes causes their moisture to convert to ice, forming sharp, jagged crystals. These crystals damage the cell structure of the potato, making it easier for them to be released once they are heated and convert to steam. Freezing will allow you to do the initial blanching and frying steps in large batches, freeze them, and have a constant supply of ready-to-fry potatoes right in your freezer, ready for your truck’s next trip to the streets.
- Return oil to 400°F over high heat. Fry half of potatoes until crisp and light golden brown, about 3 1/2 minutes, adjusting heat to maintain at around 360°F. Drain in a bowl lined with paper towels and season immediately with kosher salt. Cooked fries can be kept hot and crisp on a wire rack set on a sheet tray in a 200°F oven while second batch is cooked. Serve immediately.
We hope you found this article informative, and would love to hear the thoughts of you who try out our technique for cooking the perfect french fry. Facebook | Twitter