Events on Facebook is an application built by Facebook which will allow food truck owners and food truck event planners to spread the word about events via social media. To access its dashboard, click Events on Facebook in the left column. This brings you to the Events page and opens up additional menu options for Events. The Events page that you land on displays all upcoming birthdays and Facebook Events that have you on their guest lists. This includes Events you were invited to and Events you joined.
An Event is represented on Facebook through its Home page. A Home page evolves throughout the life cycle of an Event. Before the Event takes place, its Home page serves as an invitation and offers critical information for attendees, such as the Event’s date and location. An Event’s Home page also tracks who will or might attend the Event so that its host can plan accordingly. After the Event is over, the Home page serves as a water cooler for attendees to share their experiences in the form of photos, videos, and discussions.
An Event’s Home page is divided into two columns (in addition to the right column, which houses Facebook Ads and other unrelated content). Each column is further divided into sections or boxes. At the very top of the page, you can see the Event’s photo (at the top of the left column) and the Event’s name (at the top of the right column).
The right, or main, column of the event shows the following information, starting at the top of the page and working down:
- Attendance Status: If you’ve already said you’ll be going to an event, right below its name you’ll see a sentence reading “You Are Attending” (or “May Be Attending,” or “Are Not Attending,” depending on your response). If you haven’t responded yet, you’ll see three buttons: I’m Attending, Maybe, and No. Click whichever is appropriate to RSVP.
- Share: The Share link scattered throughout Facebook allows you to share interesting content quickly with your friends, either by sending it to them in a message or by posting it on your Profile. The Share button allows you to share an Event along with a preview containing the Event’s name, description, and picture.
If the Event is public, you may want to use the Invite People to Come action link to send an invitation rather than a link. If the Event is private, you can’t share a link to the Event with anyone who isn’t a member because the Event’s privacy settings don’t permit it.
- Event Type: Next to your attendance status and Share link, you’ll see a notice about whether the event is public or private.
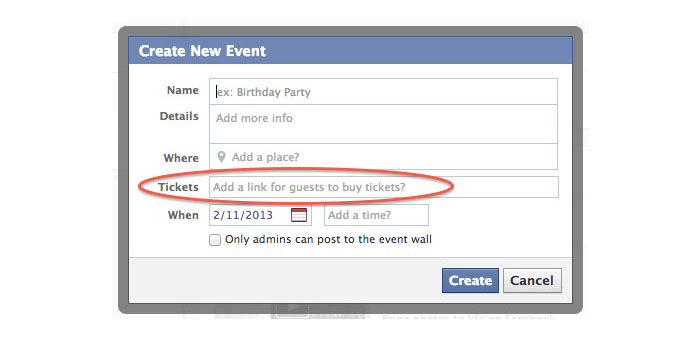
- Event Info: This area is further divided into convenient sections to show you the when (time), where (location), who (created by), and what (more info) of the event.
- The Wall: The Event Wall, like the Wall on your Profile, is where event guests can leave messages, photos, videos, and relevant links for all the guests to share.
The left column, which is topped by the Event photo, contains information about invitations. If the event is public, you’ll see a button just beneath it that you can click to Select Guests to Invite. Clicking this will bring up a friend selector that you can use to invite your friends as well.
Just because you can invite more people to an event, it doesn’t necessarily mean you should. Make sure your host is okay with you extending the guest list (a good use of the Event Wall) before you blast your whole friend list.
The rest of the left column is dedicated to guests: Who is confirmed as attending, who may be attending, who hasn’t replied yet, and who has declined to attend. The Confirmed Guests list is on top and shows you names and thumbnails of guests.
We hope this article helps those interested in spreading the word for a food truck event through Facebook. If you have any additional tips to add for events on Facebook, please share them in the comments section below. Facebook | Twitter
